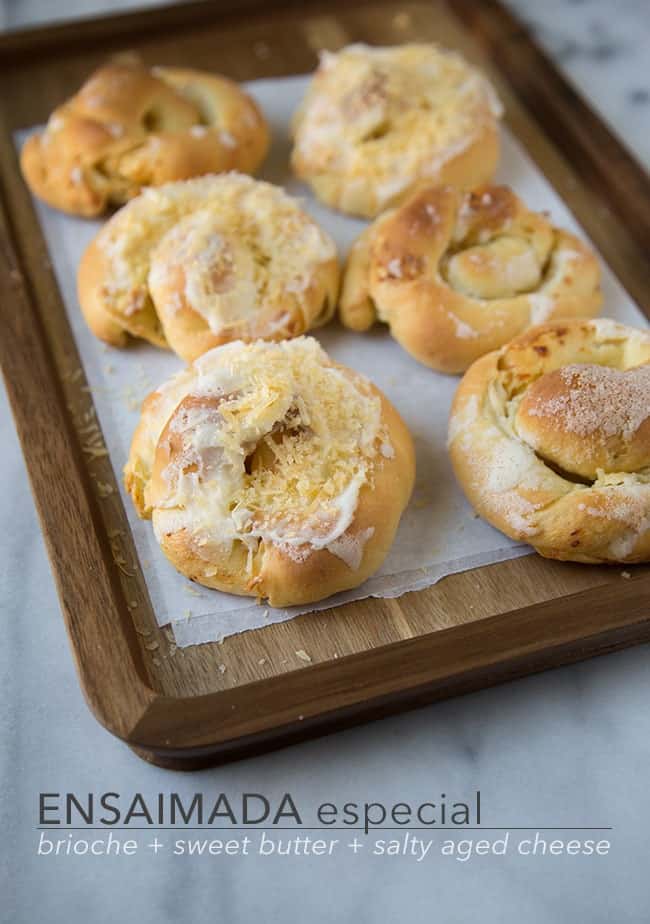
Ensaimada is a Filipino brioche bread filled with sugary whipped butter and topped with salty, aged cheese.
Food is such an important aspect of every culture. I feel that food helps one understand different cultures, as well. Having been born and raised in California, the only strong ties I have to the Philippines is its food.
As such, I have taken it upon myself to learn how to make my favorite Filipino dishes. I want to be able to share homemade Filipino food with the proceeding generations of my family. First on the list: ensaimada especial (also spelled ensaymada).
What is ensaimada? (Ensaymada)
The Philippines was first colonized by the Spanish in the 16th century. During this time, the Spanish brought all sorts of changes, especially influencing Filipino cuisine. The ensaymada (it’s spelled with a “y” in Tagalog) is an adaptation of the Spanish ensaimada.
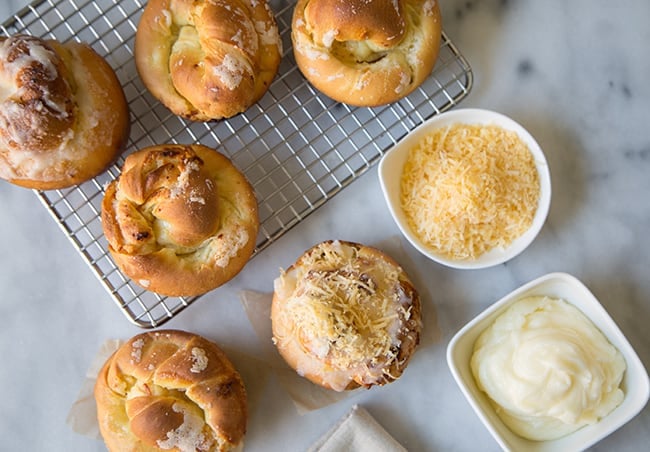
Variations
There are various types of ensaimadas. This particular version is the one I grew up eating. Essentially, ensaimada is a brioche bread filled with a sugary whipped butter and topped with salty, aged cheese.
Ensaimada especial typically is topped with grated queso de bola, which literally translates to “ball of cheese.” It is the same as Edam cheese. This is a semi-hard cheese that is most recognizable by its red wax exterior. If you can’t find Edam, an aged Gouda cheese would be a good substitute.
I had a hard time trying to find a recipe for this. I originally referred to an family old cookbook from the 70s. It helped a little bit, but unfortunately, it was missing a couple pages- mainly the pages with the instructions for this bread roll!
Using my knowledge of brioche breads from culinary school, I was able to figure out a recipe. It may be a time consuming project, but I thought it was worth all the trouble.
I loved the way the bread rolls turned out. Just as good as the ones I remember eating as a kid. Most ensaimada bread recipes call for lard or pig fat for the dough. Since I don’t have that readily available, I used butter (a lot of butter and yolks) to make the bread soft and fluffy.
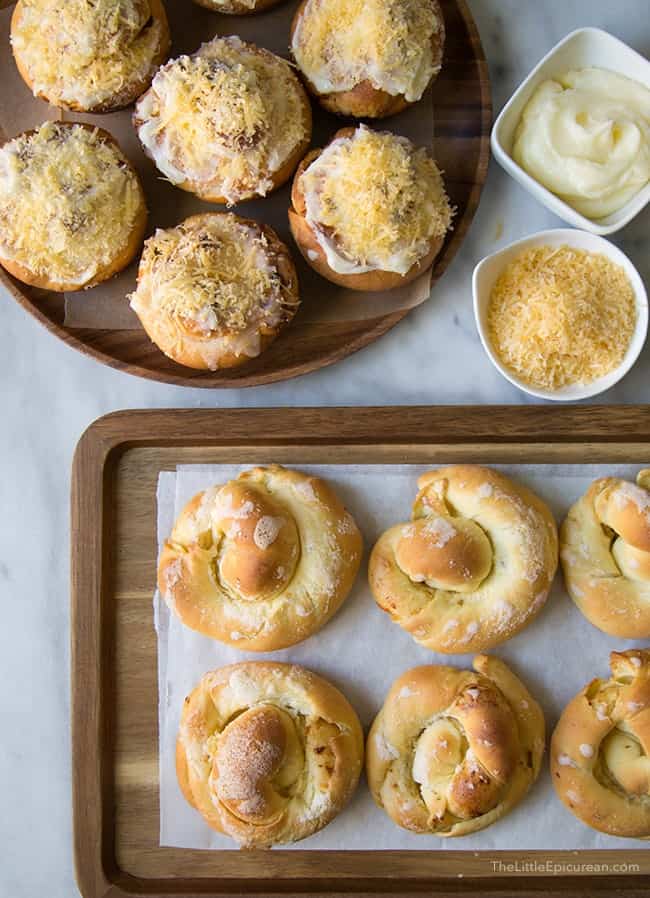
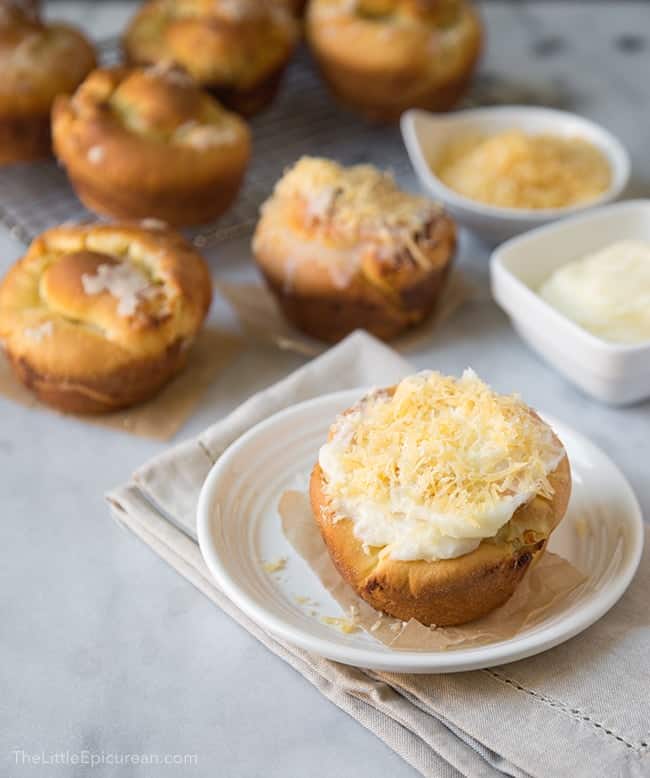
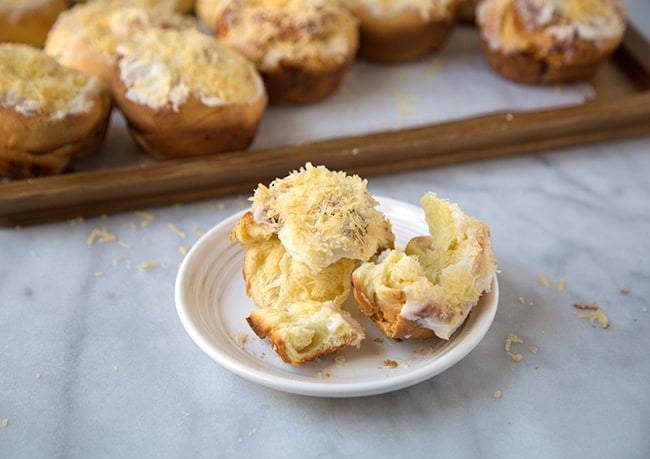
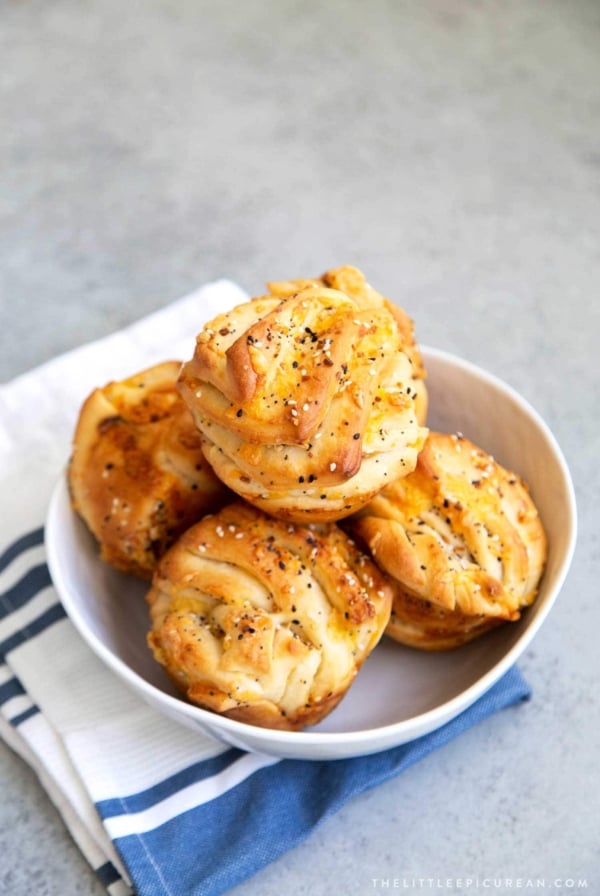
I also experimented with the formation of the bread rolls. The recipe makes 24 rolls. Half of the rolls were baked in jumbo muffin tins. I rolled the other half into snail-like bread rolls and baked them on a sheet tray. In my opinion, the the snail-like rolls better because of the larger surface area on top (meaning more cheese!).
Assembly Instructions
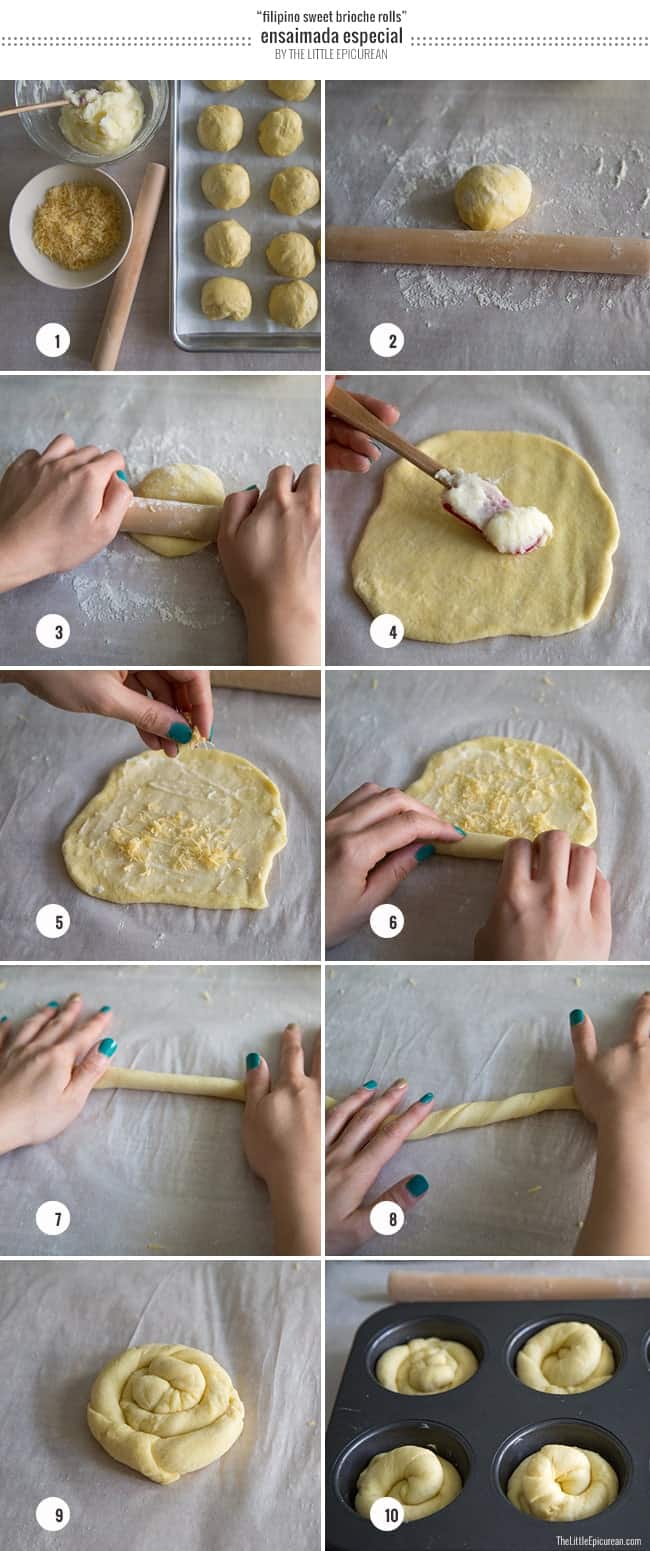
- Divide the dough into 24 portions, each weighing 65 grams. Cover dough with plastic wrap or a kitchen towel to prevent dough from drying out.
- Place one ball of dough on a lightly floured surface.
- Use a rolling pin to roll dough into a square about 5 x 5inches.
- Spread about 1/2 tablespoon of creamed butter onto dough.
- Sprinkle a little cheese over creamed butter.
- Beginning at the edge closest to you, roll dough up into a log.
- Place palms over the ends of the log. Roll and lengthen log to about 10 inches.
- Roll right hand upward while you roll left hand downward to twist the log of dough.
- Spiral twisted dough into a snail-like roll. Pinch end of log into the roll to seal.
- Place rolls in a lightly buttered jumbo-sized muffin tin. Alternatively, place rolls on a parchment lined baking sheet.
Serving Suggestions
Ensaimada is typically eaten for breakfast with tsokolate (hot chocolate) or coffee, or my favorite time of the day- merienda (also spelled meryenda), a light afternoon meal served between lunch and dinner, similar to afternoon tea.
These are best enjoyed fresh, the same day they are baked.
More Filipino Recipes
Ensaimada Especial

Ingredients
First Dough:
- 2 ¼ teaspoon active dry yeast, (7 g)
- ½ teaspoon granulated sugar
- ¾ cup warm water, about 110 ℉
- 1 ¼ cup all-purpose flour, (165 g)
- ½ cup evaporated milk, , warmed to 105-110℉
Second Addition:
- 4 large egg yolks, room temp
- 1 large egg, room temp
- 2 cups all-purpose flour, (260 g)
- ¼ cup granulated sugar, (50 g)
Third Addition:
- 4 large egg yolks, room temp
- 1 large egg, room temp
- ½ cup unsalted butter, (113 g), cut into tablespoons, room temp
- 2 ¼ cup all-purpose flour, (295 g)
- ¼ cup granulated sugar, (50 g)
Filling and Topping:
- 1 ¼ cup unsalted butter, softened, (283 g)
- 1 ¼ cup granulated sugar, (250 g)
- 1 ¼ cup grated Edam cheese, (140 g)
Instructions
First Dough:
- In a large bowl, whisk together yeast, sugar and warm water. Let sit for about 5-8 minutes until mixture is bubbly.
- Add flour and evaporated milk. Mix until combined. Mixture will be a bit watery. Cover with plastic wrap and let mixture sit at room temperature for about 30 minutes, until mixture has doubled in size.
Second Addition:
- Transfer mixture to a stand mixer fitted with a hook attachment. Add yolks, egg, flour and sugar. Mix to combine. Once new ingredients have been incorporated evenly, cover bowl with plastic wrap. Let sit at room temperature for another 30 minutes and allow dough to double in volume.
Third Addition:
- Remove plastic wrap from bowl. Add yolks, egg, softened butter, flour, and sugar. Knead/mix to combine. Continue to mix until dough is soft and ingredients have been throughly incorporated. The dough will be sticky.
- Transfer dough to a lightly floured work surface and knead into a ball. Place dough in a lightly greased bowl and cover with plastic wrap. Let dough proof and rest for another 30 minutes until it has doubled in size.
- At this point, you can slow down the proofing process by storing the dough in the fridge overnight. Let dough come to room temperature before moving to the next step.
- After dough has doubled, remove plastic wrap and punch dough down. Using a kitchen scale, divide the dough into 24 equal parts, weighing 65 grams each.
Assembly and Baking:
- In a bowl, cream together 1 1/3 cup butter and 1 1 /3 sugar. Set aside and reserve for filling and topping ensaimada rolls.
- Place divided dough on a lightly floured work surface. Lightly cover the dough with plastic wrap or a kitchen towel to prevent dough from drying out.
- Working with one portion at a time, use a small rolling pin to flatten and stretch dough into a 6-inch square. Lightly flour work surface as necessary.
- Spread about 1/2 tablespoon of creamed sugar butter over surface of dough. Sprinkle a little grated cheese on top.
- Starting with the edge of the dough closest to you, roll dough into a log. Using both palms, gently roll and stretch log to about 10 inches long. Roll right hand upward while you roll left hand downward to twist the log of dough.
- Shape twisted log into a snail-like coil. Pinch the end of the coil into the bottom of the roll. If using jumbo muffin tin, place coil in lightly buttered mold. Otherwise, place coil on a parchment lined baking sheet.
- Continue and repeat with remaining portions of dough. Once all the dough has been shaped, cover dough with plastic wrap and let sit for 45 minutes until dough has risen.
- Preheat oven to 325 degrees F. Bake ensaimada rolls for 20-25 minutes. Rotate pans halfway through baking. When rotating pans, spread a little bit of creamed butter mixture over rolls. Bake until the tops of the bread are lightly golden brown or until the internal temperature of dough is at least 185 degrees F. Let cool in pan for a couple minutes. Then transfer to a wire rack.
- Once rolls have cooled to room temperature, take remaining creamed sugar butter mixture and grated Edam cheese. Spread creamed butter over the tops of the bread, sprinkle cheese over butter.
- Before serving, warm up ensaimadas in the microwave for about 20 seconds to melt the cheese and fluff up the bread. *When reheating bread in the microwave, keep a mug of water in the microwave to keep bread moist and prevent bread from becoming gummy.
Notes
- Evaporated is recommended, but you may sub in milk or water.
- If you can’t find Edam, an aged Gouda cheese would be a good substitute.
Nutrition
Nutrition information is automatically calculated, so should only be used as an approximation.
 Like this recipe? Rate & comment below!



Ensaimada IS NOT brioche.
This sounds like the Nora Daza recipe with a few tweaks on the measurements :) I am excited to try it. Can you also freeze the dough? If so, how long can it stay frozen in the freezer?
Thank you for sharing! Do you use a dough hook to mix or this is mixed by hand?
It’s all included in the instructions. I use a dough hook attachment.
Do you have metric measurements for the flour?
Oh! I grew up eating Spanish ensaimadas (mostly, the ones with the sweet cream filling) because my grandparents were from Mallorca. And though I knew about the Spanish influence in the Philippines, I had no idea you guys have your own version! :)
These sound and look delicious!
Baked in muffin tins or just rolls, these cheesy, sweet ensaimadas look perfect! Congrats Maryanne, good job!
Thank you Tita Ebu!! :)
Oh wow, this looks amazing Maryanne! Do you happen to have any leftovers? You should bring me some ;-) Haha!
Costco happen to have a good aged Gouda cheese, it’s very similar to the ones in the Netherlands. It’s called ‘Rembrandt’ and has a black wax crust.
Thanks Ellen! I ate them ALL! But don’t worry, I’ll be making them again :) I’ll have to look out for that cheese next time!