Japanese milk bread is the fluffiest and softest bread loaf ever. It’s great on it’s own, with some butter, or a little condensed milk.
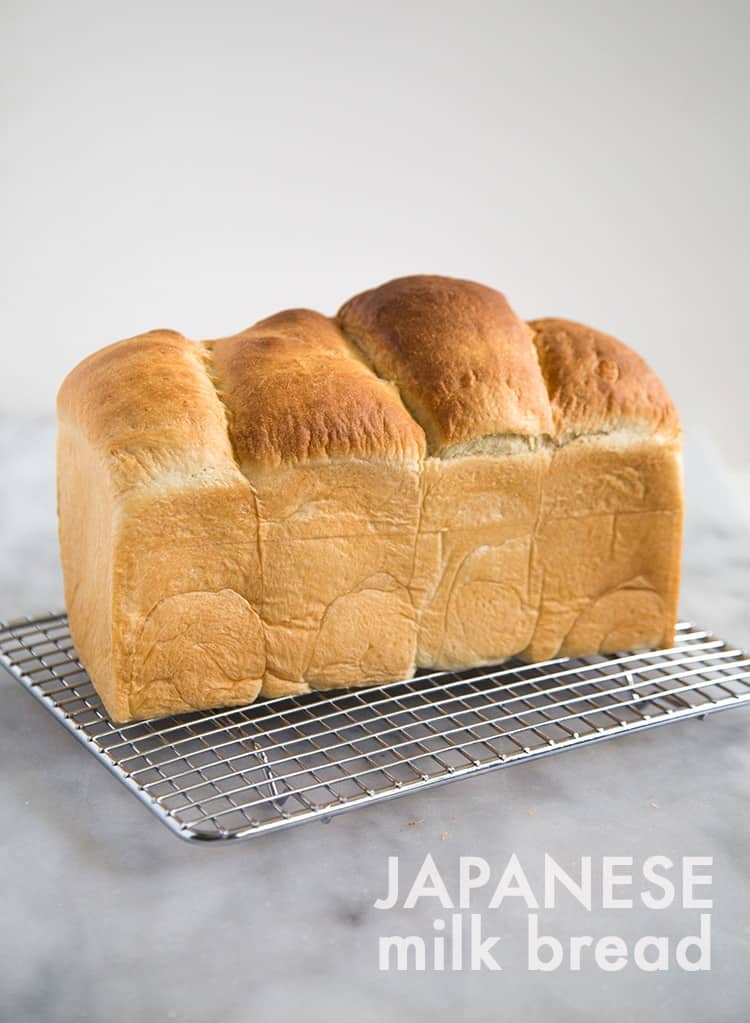
Bread is my weakness. Crusty French baguettes, chewy Italian ciabatta, and this oh so fluffy and heavenly Japanese milk bread.
Ever since my high school days, there have always been diets and fads telling me to stay away from breads. It’s not that I couldn’t do it, it’s just that I don’t want to deny myself something so tasty.
I could give up chocolate, espresso, and maybe even whiskey, but refraining from breads…that might be a real tough one.
Table of Contents
Japanese Milk Bread
For most of my childhood, my mom would only purchase two types of bread: Filipino pan de sal and Japanese milk bread.
I grew up eating bread with a slather of salted butter, maybe a piece of hard cheese, or a giant spoonful of sweetened condensed milk (the best!).
As I’ve gotten older, I’ve come to favor more heartier breads, but to this day, I still cannot enter an Asian bakery without buying a loaf of milk bread.
And that got me thinking…what if I had to move to an area that didn’t have my favorite breads? What would I do?
Naturally, the answer is simple. Learn to make all my favorite breads starting with this Japanese milk bread. (Up next, pineapple buns/melon pans!)
How to make Hokkaido Milk Bread:
Even if you’ve never made bread before (or you’ve been intimidated to try), this will be the bread that will change your mind.
Japanese milk bread (also known as Hokkaido milk bread) is known for it’s distinct slightly sweet flavor and soft interior.
The secret to this fluffy milk bread is it’s use of a starter (water roux). A simple mixture of flour, water, and milk creates this paste that helps to produce the fluffiest bread ever.
Even four days after baking the bread, the loaf will remain soft and springy like the first day.
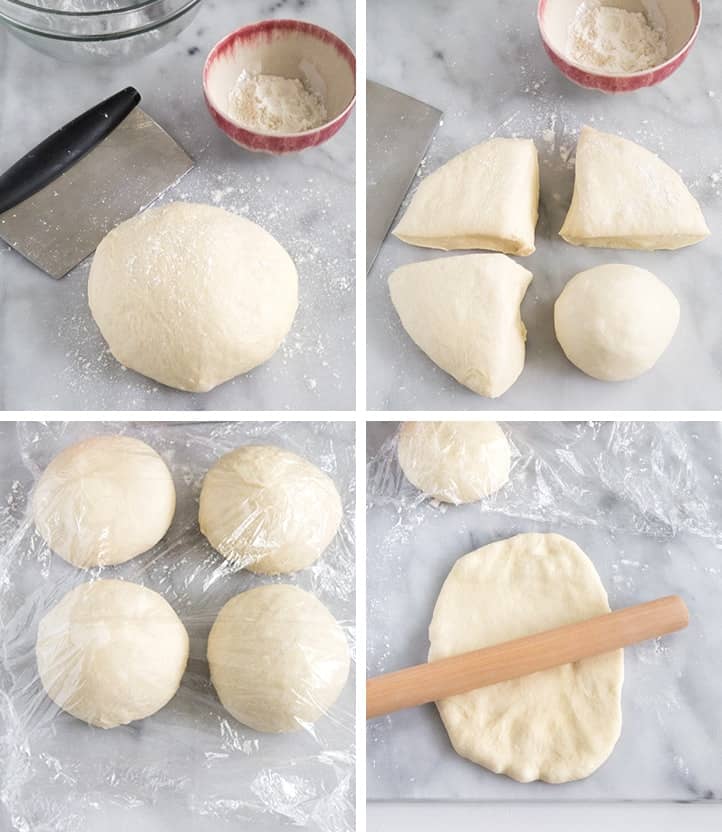
Combining all the ingredients for the dough is fairly simple and straight forward. Once you’ve let the dough rest and rise for an hour, place the dough on a lightly floured work surface. Divide the dough into four equal parts.
Keep the cut dough under plastic wrap to prevent it from drying out or forming an unwanted skin. Roll the dough into balls. Working with one ball at a time, flatten or roll out dough to a length of about 8 inches and width of 5 inches.
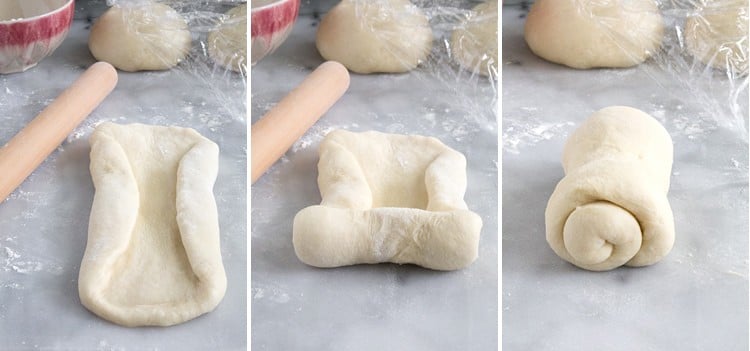
Fold in about 1-inch on both sides of the dough. Starting from the end closest to you, roll the dough into a log. Repeat with remaining dough.
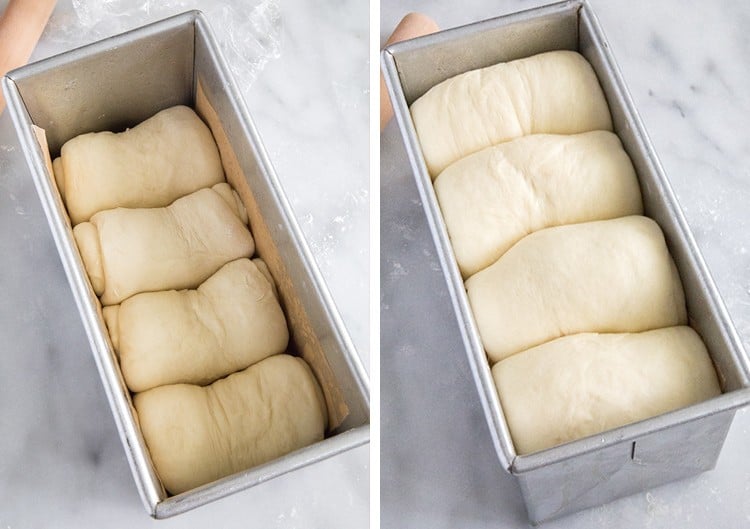
Place the logs seam-side down in a buttered and parchment lined loaf pan.
Cover loaf pan with plastic wrap and let rest for 30-45 minutes until dough has doubled in volume.
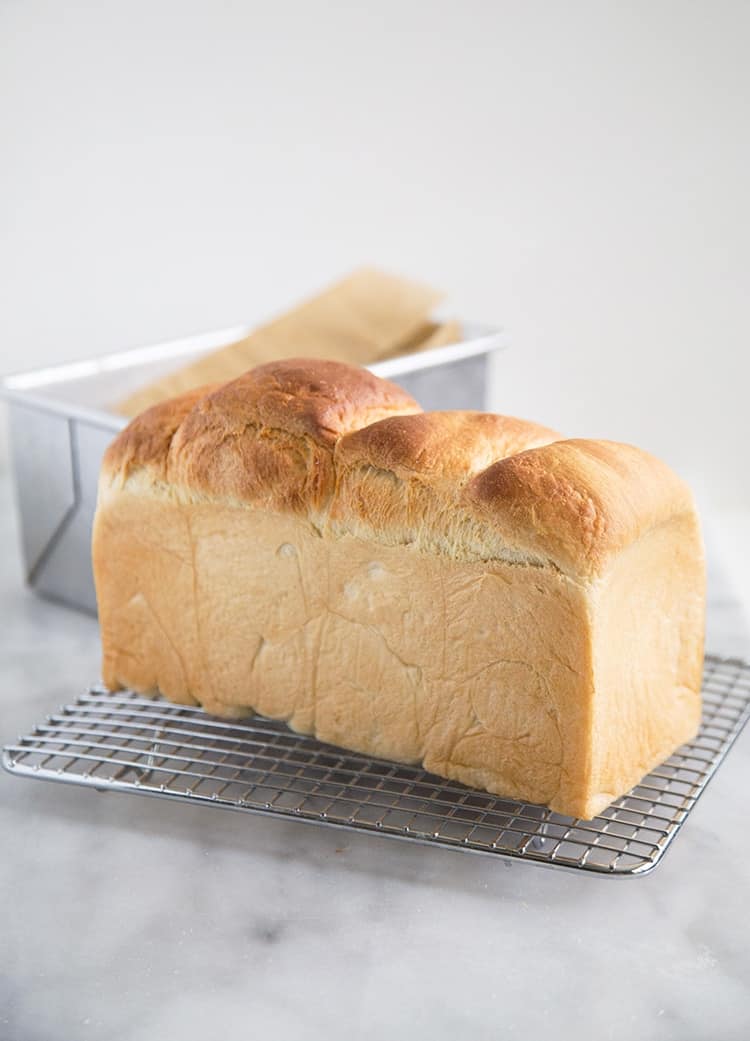
Lightly brush the top of the dough with heavy cream. Bake in a 350 degree F oven until the top of the bread is a nice golden brown and the internal temperature of the bread is at least 190 degrees F.
If the bread top colors too fast, place a foil tent over it to prevent it from burning.
Let the bread cool in the loaf pan for 5 minutes before unmolding, then allow the loaf to cool to room temperature on a wire rack. Once cool, go ahead and slice yourself a piece!
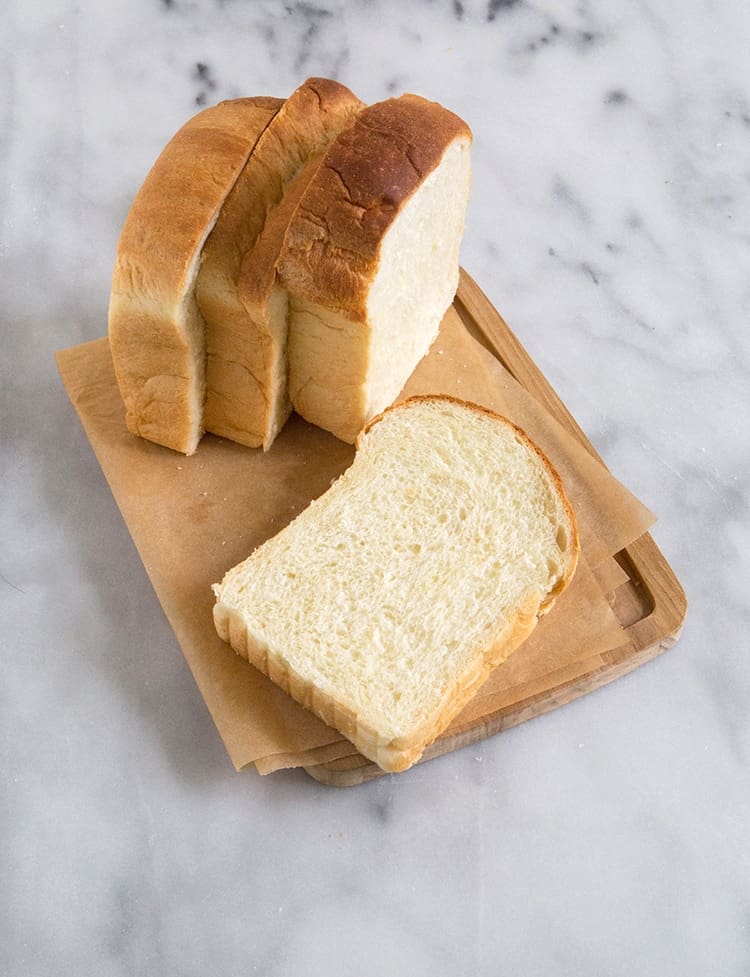
Japanese Milk Bread
Ingredients
Starter:
- 3 Tbsp bread flour , (25 g) or all-purpose flour
- ¼ cup whole milk, (60 ml)
- ¼ cup water, (60 ml)
Dough:
- 2 ½ cups bread flour, (325 g)
- ¼ cup granulated sugar, (60 g)
- 2 ¼ teaspoons active dry yeast, (7 g)
- 1 Tablespoon non-fat dry milk powder, , optional*
- 1 teaspoon fine sea salt
- 1 large egg, lightly whisked, room temperature
- ½ cup whole milk, (120 ml), room temperature
- ¼ cup unsalted butter, (60 g), softened
- heavy cream, as needed for brushing
Instructions
- Starter: Stir together flour, milk, and water in a microwave safe cup. Mixture will be slightly lumpy. Microwave for 20 seconds. (NOTE: this cooking time refers to a 1100 W microwave.) *See notes for directions cooking starter stovetop.
- Remove from microwave and stir mixture together. Mixture will have thickened. Stir and break up any large clumps of flour. Then, return to microwave and heat for another 20 seconds. Remove from microwave and stir together. Heat for another 15 seconds until mixture is smooth and has thickened to the consistency of mashed potatoes. *If needed, return to microwave for another 10 seconds and mix again.
- Transfer mixture to a cool clean bowl. Let mixture sit for 15 minutes to allow to cool before adding to remaining down ingredients.
- Dough: In the bowl of a stand mixer, whisk together bread flour, sugar, yeast, milk powder and salt. Attach dough hook to mixer. Add in cooled starter mixture, egg, and milk. Knead on low speed for 5 minutes. Scape down bowl to ensure thorough mixing.
- Add softened butter and continue to knead on low speed for 5 minutes until butter is integrated into dough. Increase speed to medium and knead for another 5 minutes until dough is smooth and pulls away from the sides of the bowl.
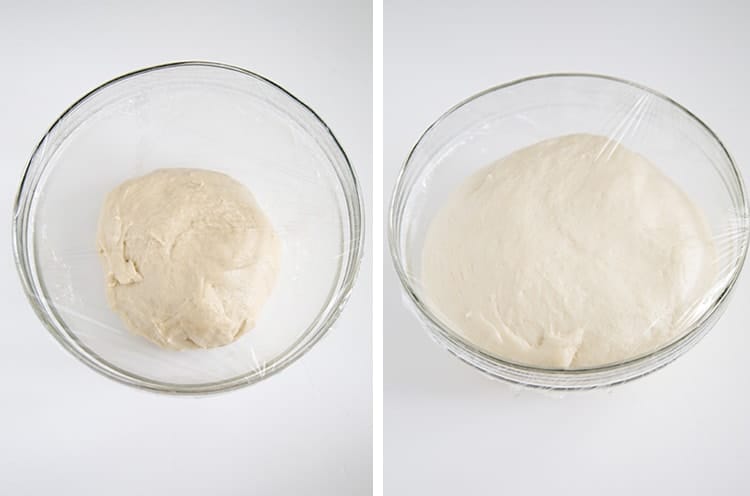
- Transfer dough to a lightly greased bowl. Cover with plastic wrap and let rest for 1 hour, or until dough is doubled in volume.
- Line a 9 x 4-inch loaf pan with parchment paper. Grease and set aside. Transfer dough to a lightly floured working surface. Divide dough into four equal parts and roll into balls. Cover dough with plastic wrap as you work to prevent it from drying out or forming a skin.
- Working with one ball of dough at a time, flatten or roll out dough to a length of about 8-inches and 5-inches wide. Fold in about 1-inch of the sides. Starting from the end closest to you, roll the dough into a log. Place log seam-side down in prepared loaf pan. Repeat with remaining dough balls. Cover loaf pan with plastic wrap and let sit for 30-45 minutes until dough has doubled in volume.
- Lightly brush the top of the dough with heavy cream. Bake dough in a 350° F oven for 35-40 minutes until the top of the bread is golden brown and internal temperature of bread is at least 190 degrees F.
- Let cool in loaf pan for 5 minutes. Unmold bread from loaf pan and allow to cool to room temperature on a wire rack. Once cool, slice bread accordingly.
Notes
- Milk powder provides additional flavor. It is optional and can be omitted.
- RECIPE SLIGHTLY ADAPTED FROM THE NEW YORK TIMES
Stovetop Starter:
Double the amounts listed in the starter ingredients for stovetop. It is difficult to cook a very small amount in a pot.- In a medium pot, whisk together bread flour, milk, and water. Set over medium heat and stir often, making sure to stir the bottom edges of the pot. Cook for about 5 minutes until mixture has thickened to the consistency of mashed potatoes. Remove from heat and transfer to a bowl. Cover with plastic wrap, allowing wrap to lay directly on top of starter mixture. Cool to room temperature. Use 1/2 cup of starter in the recipe. Discard remaining starter.
Nutrition
Nutrition information is automatically calculated, so should only be used as an approximation.
 Like this recipe? Rate & comment below!
What do with this Japanese milk bread?
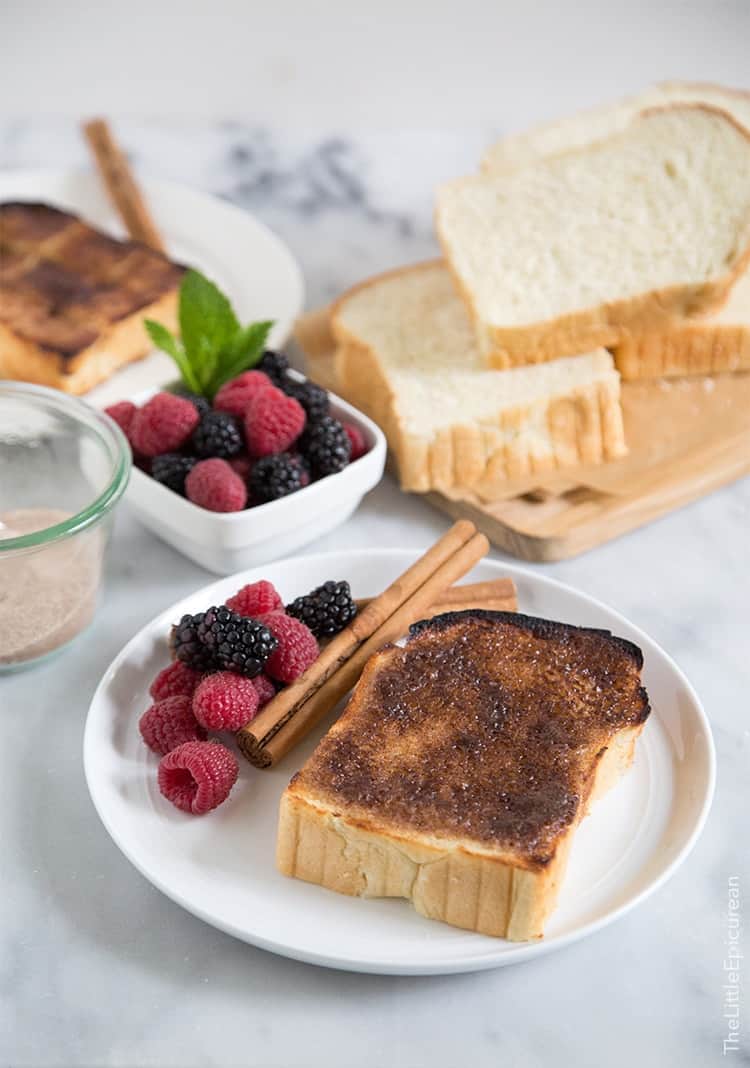
This milk bread tastes great on it’s own. I mentioned that I enjoy milk bread with butter or condensed milk, but my MOST favorite way to eat milk bread… is this cinnamon sugar milk toast.


My son brought me this recipe 8 or 9 years ago. It was an instant hit. My families favorite is to add cinnamon and sugar before rolling the 4 pieces up. The original starter made 2 loaves. And I triple that and 6x’s the recipe. My family is smaller at home now, but friends always welcome a loaf.
First time great success , wish I could upload a picture!
Have been watching your site evolve since Chicago and French Pastry school days. I am planning to retire soon and have time to try more of your recipes. Hands down this recipe was explained Uber well (so easy to microwave starter) and the product was outstanding. Keep sharing. It is appreciated.
Hi! I LOVE this recipe so much and really admire your work. Would it be possible to fold chocolate chips into the dough? If so, how? Thanks!
I add cinnamon and sugar before I roll out the pieces. I’m sure you could sprinkle the chocolate chips(maybe mini) the same way
I loved making this and it is very nice, but I found I had to add more flour as the dough was too wet. I think I must have easily added another 50g. I used strong white bread flour. I just can’t see how the dough would have come away from the bowl without more flour. Did anyone else have this issue? Is it better to have it a bit wet? I see someone in Hawaii thought it might be humidity and while there’s a lot of rain in the UK, I can’t see that being the cause ! (:-) Thank you though, I will make it again, but a tip on the flour and why it’s only 325 would be good to know.
Starter quantity – is it 25g flour, 60 milk and 60 water for 1 loaf using 325g flour etc? Or should I half the starter? I made this today, found it too wet, added more flour. There are people who think it should be halved, but I don’t see how that can be as you say on the hob to use double the quantity, and then just use half. Did I use the right amount? 25/60/60 for 325? Or should I use 12/30/30? Thank you!
I have electric bread makes! I want to make Japanese milk soft bread tasty! I have been trying but haven’t found good results! Can you help?
Hi! Sorry, I don’t have any experience using electric bread machines.
Your bread looks so light and fluffy! I tried the recipe and my bread came out more crumbly and dense. Any idea where I went wrong? Would love to try again!
I’m sorry to hear that it didn’t work out for you. Did you use cups or weight measurements?
Your recipe is quite similar to the way I bake for my family’s breakfast. Sometimes, I add chocochip or matcha powder